In my opinion, note-taking for learning Anatomy (and Physiology) lectures is one of the things that transformed my studying. Because, unlike other subjects (especially those we took in high school), Anatomy brings together different types of learning: memorising, understanding difficult concepts and processes, 3D visualisation, and expressing learnt concepts in essay-style questions, etc. This is why note-taking should adapt to facilitate the combination of different studying styles and a thorough comprehension of anatomical concepts. I will show you step by step my method of taking notes, and how to set yourself up for success.
This post will be all about methods of getting great notes in lectures and at home when studying, specifically for learning Anatomy + showing you my full note-taking routine.
This post may contain affiliate links. This means that if you click on my link and make a purchase, I may receive a small commission – at no extra cost to you. Full disclosure here.
Tips to create notes that will help you understand Anatomy better
Digital or paper-based notes?
This is an important question, and I’m quite passionate about discussing it. For me, I found this sweet spot between taking notes on my iPad mostly in class, and expanding difficult concepts or revising on paper, at home. It usually depends on what learning support I have in parallel. For example, if I have my professor teaching, I will only take notes on my iPad, but if I have a textbook as support, I will use the iPad to complete my notes, and paper to create drawings, mind-maps, or summaries of complicated subjects, in addition to my main notes.
Other times, I might have my iPad or laptop as support (PDFs, Anatomy learning platforms, etc.) and then I’ll take notes on paper for sure. The idea is to create a system where everything is working together and every method serves a purpose, so that you always know where to search for something.
Because I use both, I will divide this article into digital and paper-based notetaking methods, so that you can see the full picture and why they work so well together for learning anatomy. I will also recommend tools for both of these methods to get started faster.
Digital note-taking advice and how I do it
For me, digital taking is at the basis of my note-taking process, and it all starts in class. I do everything on GoodNotes 6, I wrote more about it when discussing note-taking in this article, but now I’ll show you how I actually use it in real life.
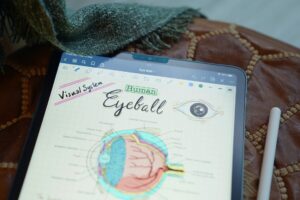
When the professor starts teaching, I already have the course support open on my iPad and my Anatomy notebook ready to use in parallel, looking something like this. (Pro tip: try getting the courses from older students if they are not available to you at the beginning of the class.)
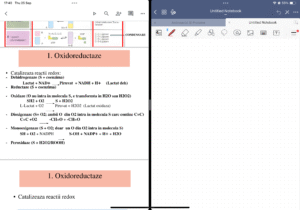
You can always just open the course in GoodNotes as well and just swipe to go from the notebook to the course easily. This way, I can annotate the course support with extra information, but I can also easily write down what the professor is saying in more detail in the notebook. The purpose is to have a clear structure by the end, which is similar to the course with all the explanations. It’s also important to flag any information that will be on the exam or that needs precise memorisation. The notebook is the foundation, and the course helps you understand everything and serves as the basis for studying.
At home
Note-taking for learning Anatomy after class: it’s important to go through the notes and compare them to another source of information, such as the recommended textbook or the materials suggested for use. This is the refining part. You want that by the end, the notes to be complete with all the information for the exam, the teacher’s remarks, what you find more difficult clearly flagged, and info that you wanna come back to highlighted. This is when I would also redo the drawings I made in class because they are usually made in a rush and might be incomplete. It’s also the perfect moment to create flashcards and revise them.
GoodNotes features I use for this
- The ability to open multiple types of documents, such as PDFs, PowerPoint presentations, or Word documents, so I can annotate them quickly in class.
- Coloured pens, highlighters, “sticky notes”, stickers and everything to coordinate my notes, make them aesthetic and purposeful. I would recommend setting different colours and symbols for different meanings, so that everything is connected.
- Folder organisation for each subject: each folder contains the courses I annotated, my notebook, and the extra materials I used for the class.
- The keyboard feature, because for some classes, is just easier and faster to type everything instead of using handwriting (I love this iPad removable keyboard).
- Rearranging handwriting and drawings to fit the layout I want.
- Adding internal links to connect different pages of notes or external links to more information (this has been so helpful!!).
Grab GoodNotes 6 here, and my favourite iPad here.
Paper-based notetaking
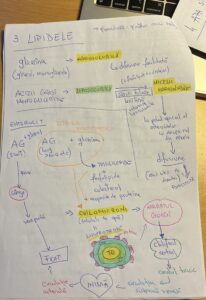
I would begin integrating paper-based notes closer to the exam season when I start revising. Because my studying style is processing information as I write it down, at first, some notes will look like summaries, with many drawings, arrows and connections between information on the same page. I would have my textbooks open, with my main notebook and course on the iPad, and I would start writing summaries and mind maps to help me understand and actively recall subjects better. They might look something like this:
I would create separate papers including larger drawings, or more detailed explanations for specific subjects, and store them all in different colour-coded folders so that I can find them easily. They don’t have to have a specific structure or be 100% complete; they need to be accurate and serve a purpose. For me, this is the first step in revising, so I just use them to perfectly understand the concepts, and help me memorise them.
I would also do physical “flashcards”, which basically are just paper notes on smaller pieces of paper with exclusively content that I wanna memorise (muscles, nerve names, percentages, etc.). These would also be stored in their respective folder or placed strategically around my desk, home, or study area.
Tools I love for making physical notes
- STABILO Boss 23 deskset: I love a good variety of colours, and they have an anti-dry-out technology, which is so helpful for using multiple colours at the same time. Very good for the price as well.
- BIC Gelocity Quick Dry gel pens (in Ocean theme): So easy to write with, so many gorgeous colours, and we all love a good gel pen that flows well on the paper – tricky to find but these are just it.
- File Folders with pockets for storing everything organised, like I said, I also have smaller paper notes so the pockets are a great addition.
Extra tips for making drawings
- Keep them clear and to the point. Don’t use too many lines or colours because you will end up not understanding what is what.
- Annotate everything you draw, because you might not remember what a certain line meant when you first drew it, even if it seemed intuitive then.
- Make colours meaningful. For example, always colour the cellular cytoplasm with light green, or the arteries in red and venules in blue. This way, your brain will automatically make the connections faster.
- Don’t overcomplicate drawings. Add any additional information below, not on the drawing. They should serve as a good basis of where everything is, not a source of important info.
- Where relevant, print out the basis, or add it from the web. Some anatomical drawings are too difficult to do by yourself, so to mix the learning by drawing technique with still good quality drawings, get a clear, empty image online and annotate it yourself. It’s better than learning from weak or unclear drawings.
I hope this article served as a good basis to start making smarter notes for the Anatomy class, and I hope you found an answer to some of your questions if you’re only starting with this subject. As always, feel free to reach out!
About the author
![]()
Hello everyone! I am the creator of The Learn Medicine Club — an international medical student who successfully navigated the UK med school admission system, passionate about sharing study hacks, application tips, and resources I wish I had when starting out. I hope to make the road to university easier for students with similar dreams. Feel free to reach out!:)
